Art Fair Booth Evolution
My art fair booth didn’t start like this!
My Early Shows - 2012
I first started doing art shows, with an actual booth, in summer 2012. Prior to that, I did my first “show” in a room in December 2011, using nothing more than a table with 8x10 prints. Everyone came by to see Santa Claus, and then on to the ice cream stand. As table, as were many others that night, just paid the bills for the civic organization. However, I did find I enjoyed talking with the people about my prints.
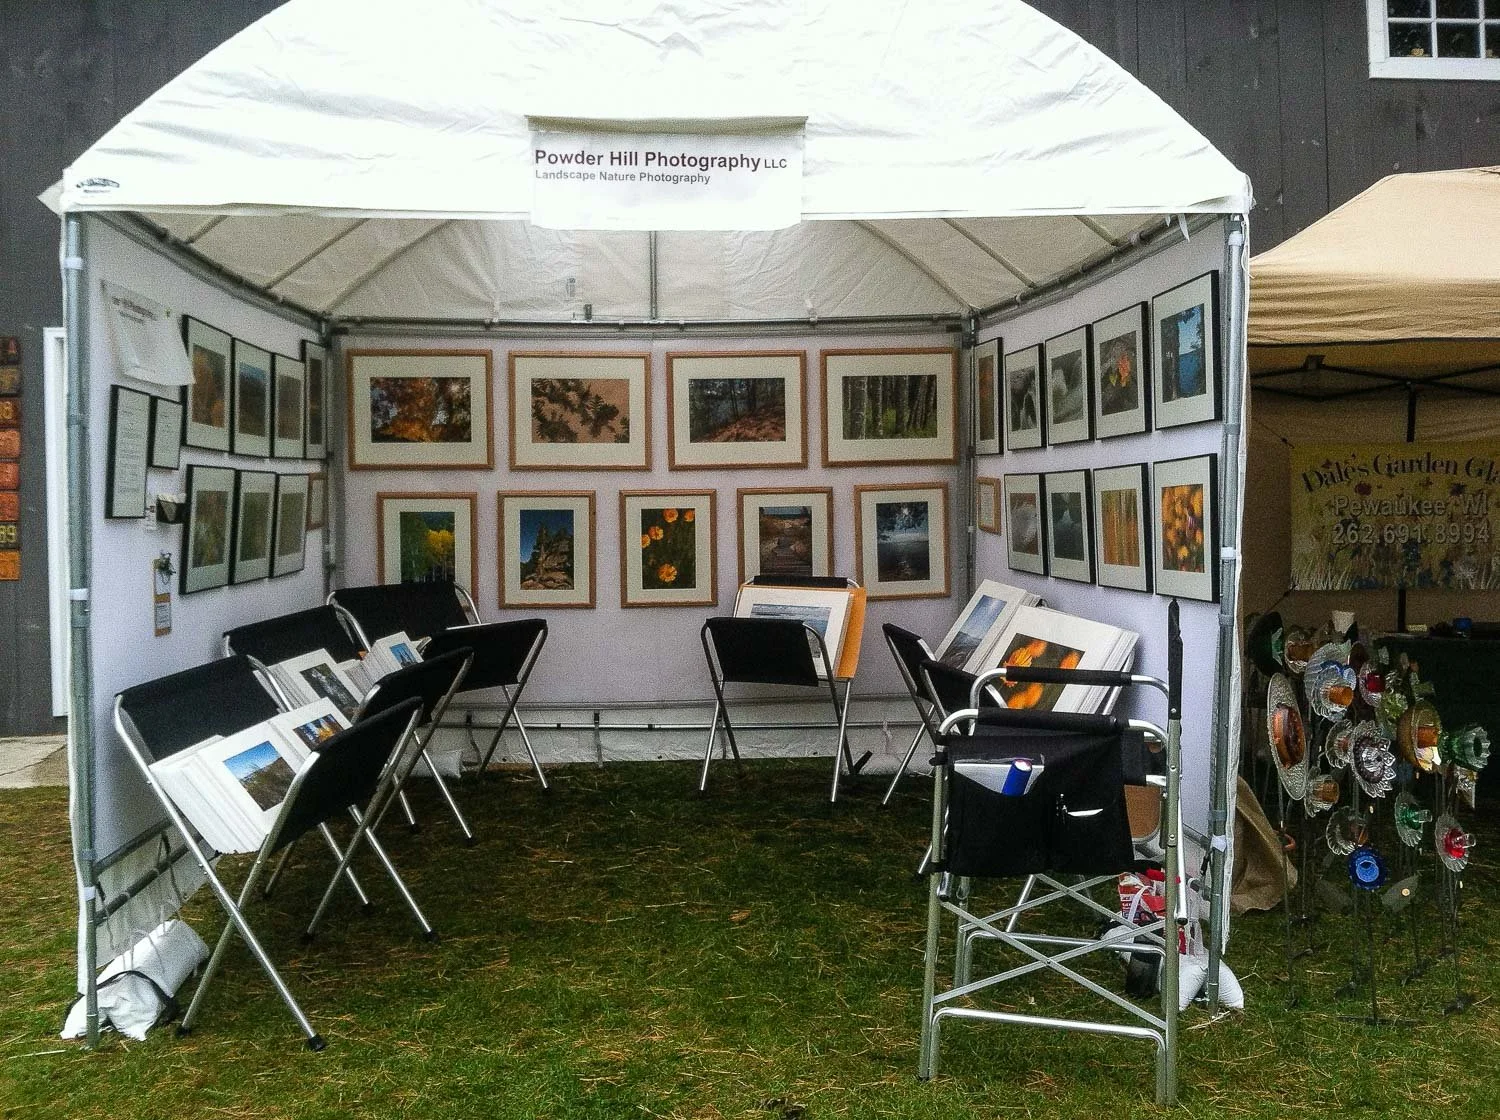
My first outdoor booth was somewhat Spartan. (top left) The mesh walls of my Trimline canopy were quite vacant.
As you can see, I had a few metal framed prints on the walls, along with matted prints without frames. I carried three sizes of matted prints, 8x10, 11x14 and 16x20 - with each size dedicated its own canvas print bin. Each bins was over-flowing. I knew I needed to change that plan.
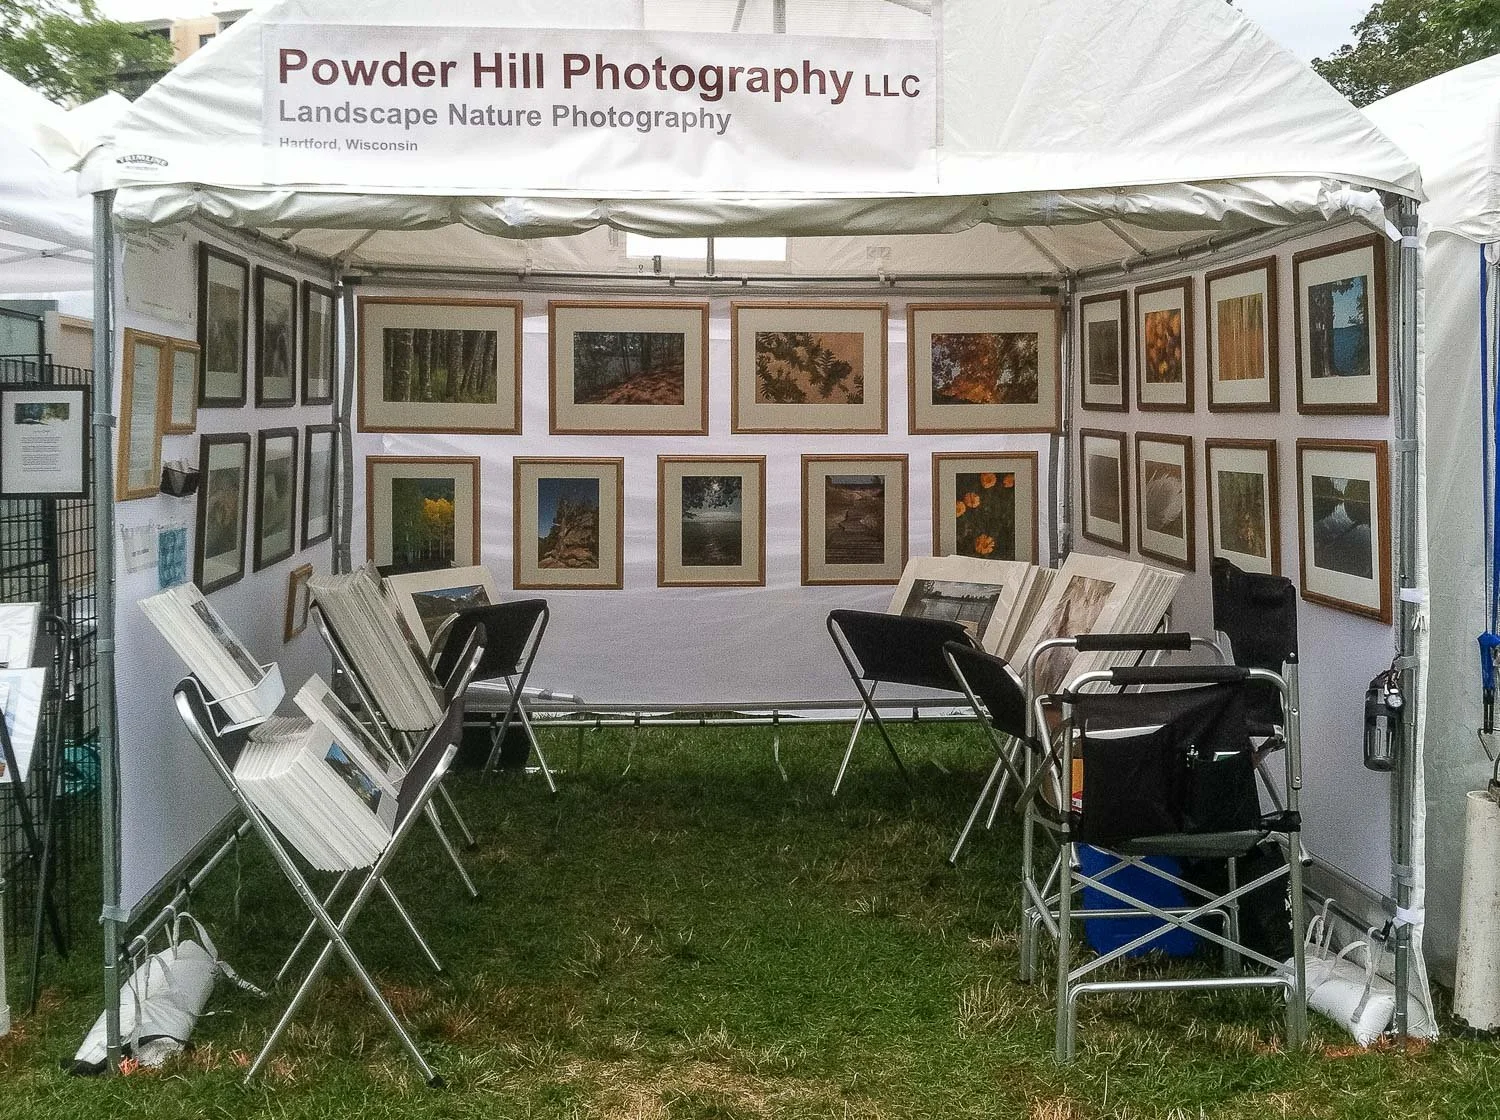
By the end of the 2012 season, I had six canvas print bins, again separated by size and also orientation (vertical vs. horizontal). Because the ground was sloped at this particular show, my print bins were arranged effectively on three walls. (Top right image)
My booth walls started to look more professional. I used metal framed matted prints on the side walls, with oak framed matted prints on the back. It was getting better, but I still wasn’t satisfied.
2013 - Cleaner Booth Appearance
If one thought I had a lot of prints in 2012, that expanded in 2013! I even made a “upper shelf” to hold additional 11x14’s. I also started displaying 20x24 matted prints and no longer carried the 8x10’s.
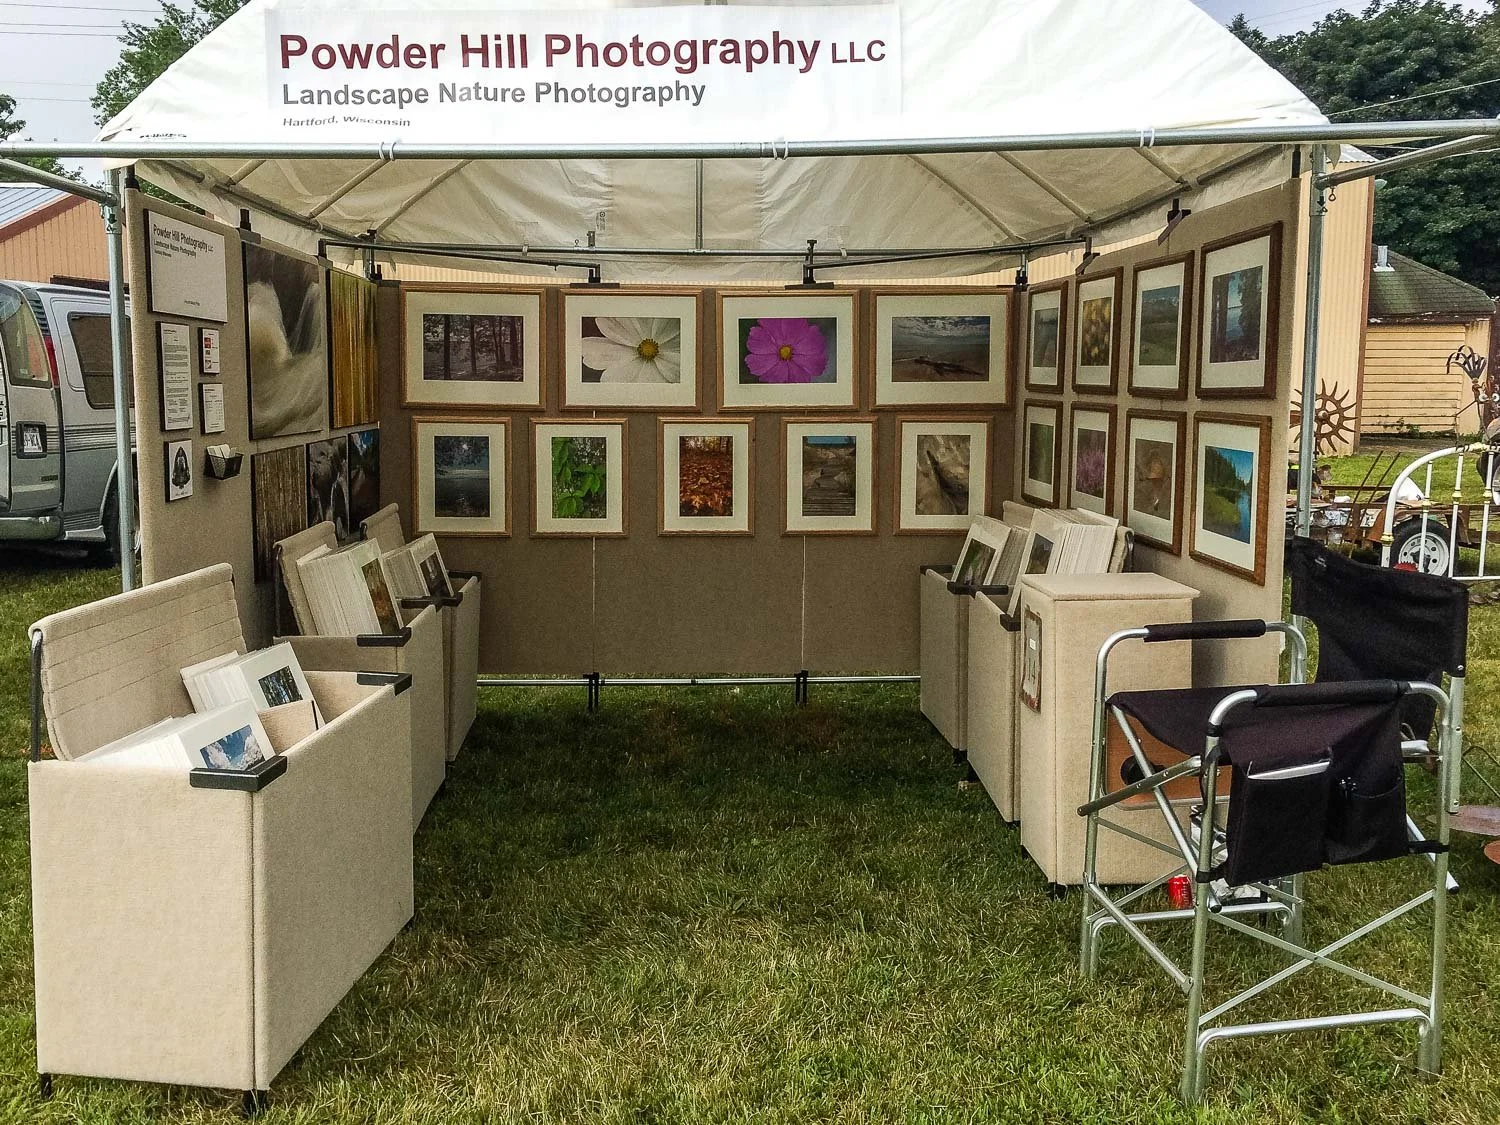
Talk about choices! I clearly had too many!. (Booth image above left)
That spring, I also introduced my booth with the same oak wood frames on all three walls, differentiated by the stain color. Black stain on the left wall, clear on the back and brown stained frames on the right. Both side walls and the lower row of the back wall were 16x24” framed prints. The upper back row as 20x24 framed print.
Looking at my booth from a distance, it was just cluttered! Due to the way the print bins stood, a lot of interior floor space was wasted. I know people felt confined as they tried to view my artwork.
Mid-summer, another change. Keeping everything else the same, I purchase Pro Panel adjustable print bins. One larger unit held all the matted 11x14’s (both vertical and horizontal). The vertical and horizontal larger prints (16x20 and 20x24 matted prints) were each dedicated to their own bin. (Booth image above right).
Notice how much additional interior floor space I now had in my booth! Customers no longer felt so confined.
2014 - Larger Prints, and new Panels
During my first two years, I often had people ask me if I printed larger. When I first had 16x20’s as the largest, I was asked if I print larger.
After adding 20x24 matted prints, again the question was “Do you print larger?
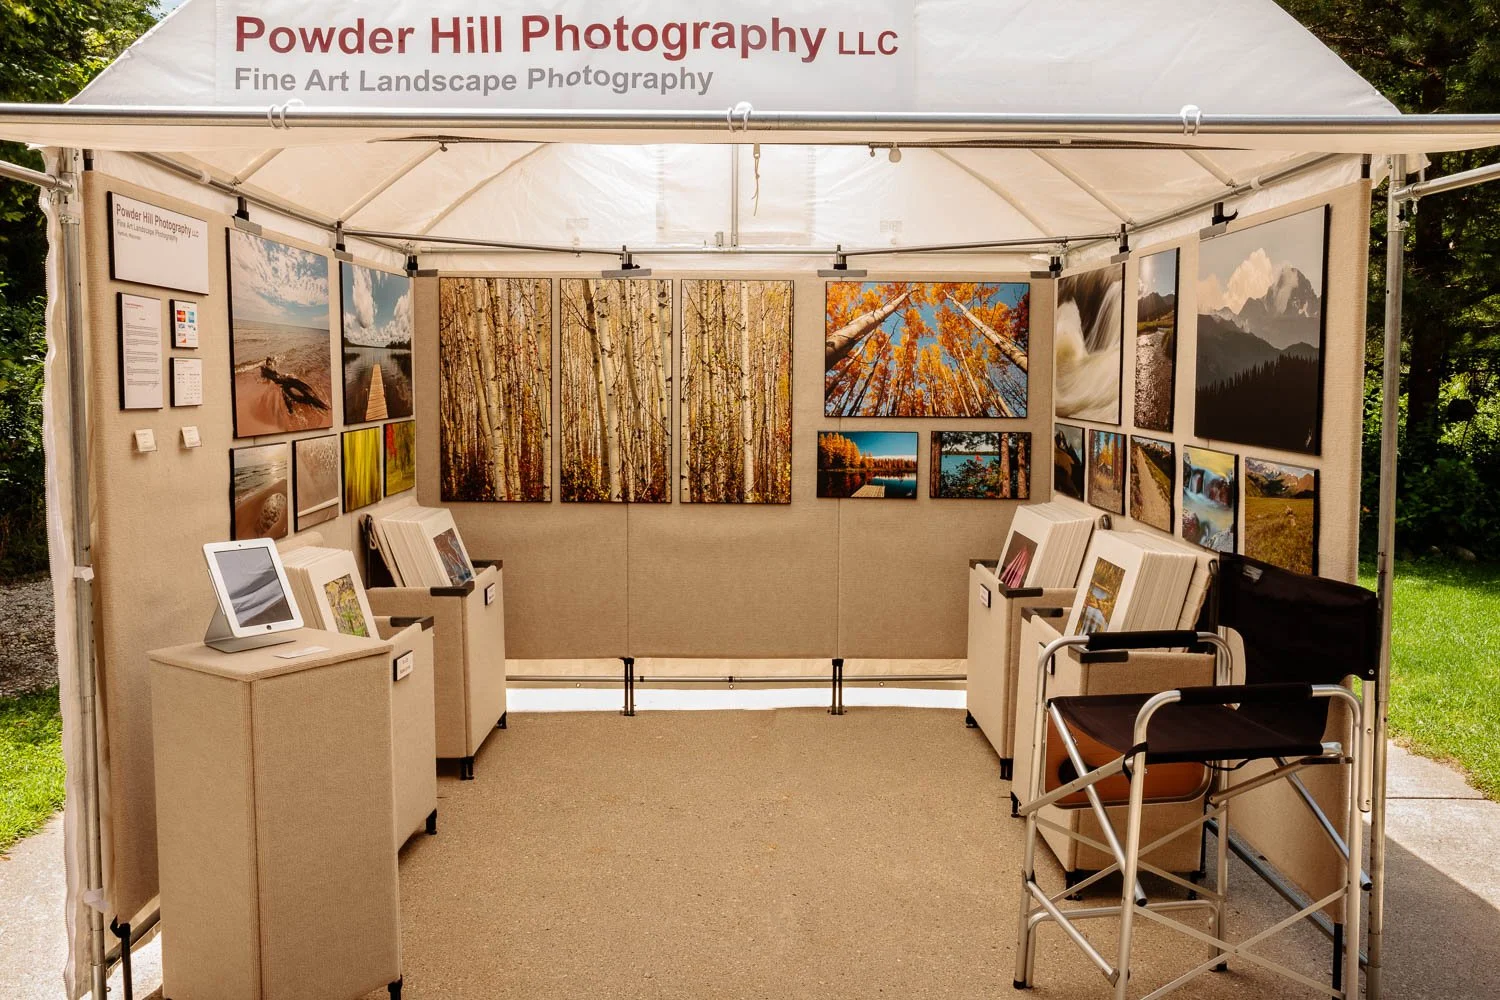
In early 2014, I added to the left wall (above left booth image) 24x36” Dura Plaq-mounted prints. Because they do not require frames or matting, the resulting art work was essentially the same as the print dimension (plus an additional 3/4” in both directions). I would still get the question “Do you print larger?” though not nearly as often.
Dura Plaq prints require a different type of mounting, as compared to framed prints. To make each work with the Trimline mesh panel walls, I created a hook system that worked, but also showed above the print. Too many people would focus on the mounting hardware (which was only for the show), and not the print.
As a result, I purchased Pro Panel display walls, used (a lot of) Velcro to mount the Dura Plaq to the walls. The focus on how they were mounted went away overnight. (In actuality, wall mounting your Dura Plaq print in your own home will not require Velcro!)
Late in the year, I started to transition displaying more Dura Plaq prints, removing the framed prints. (Above booth image, upper right).
2015 - A Few Additional Changes
I left my booth “as is” with a few changes in 2015.
One of three changes I made included completely removing all framed matted prints and displaying only Dura Plaqs on the walls. The largest Dura Plaq was 24x36”, displaying six of that size. The question returned, “Can you print larger?” I addressed that question in greater detail the next year,
A second change was no longer carrying 11x14” prints. Rather, I only had 16x20 and 20x24 matted prints.
With the removal of the 11x14 bin, I added a small ProPanel mini desk. It works great for storing needed items, and also provided a location to take email addresses for my newly created newsletter. At that time, I used pen and paper. Even if I wrote out the information (which was usually quickly written), I discovered I lost, on average, 20% of the email contacts simply because I couldn’t read my writing! That had to change.
2016 - Triptych and iPad
With the exception of my “table top show” in December 2011, I’ve always printed my own artwork. To print larger, I purchased the Epson Stylus Pro 7900 (replaced in December 2020 with the Epson SureColor P7570, both of which are large format professional printers). Each printer has a 24” maximum width printing capability.
Printing my own work has always been very important to me. The print is the final vision. That is something I can’t very well turn over to a lab.
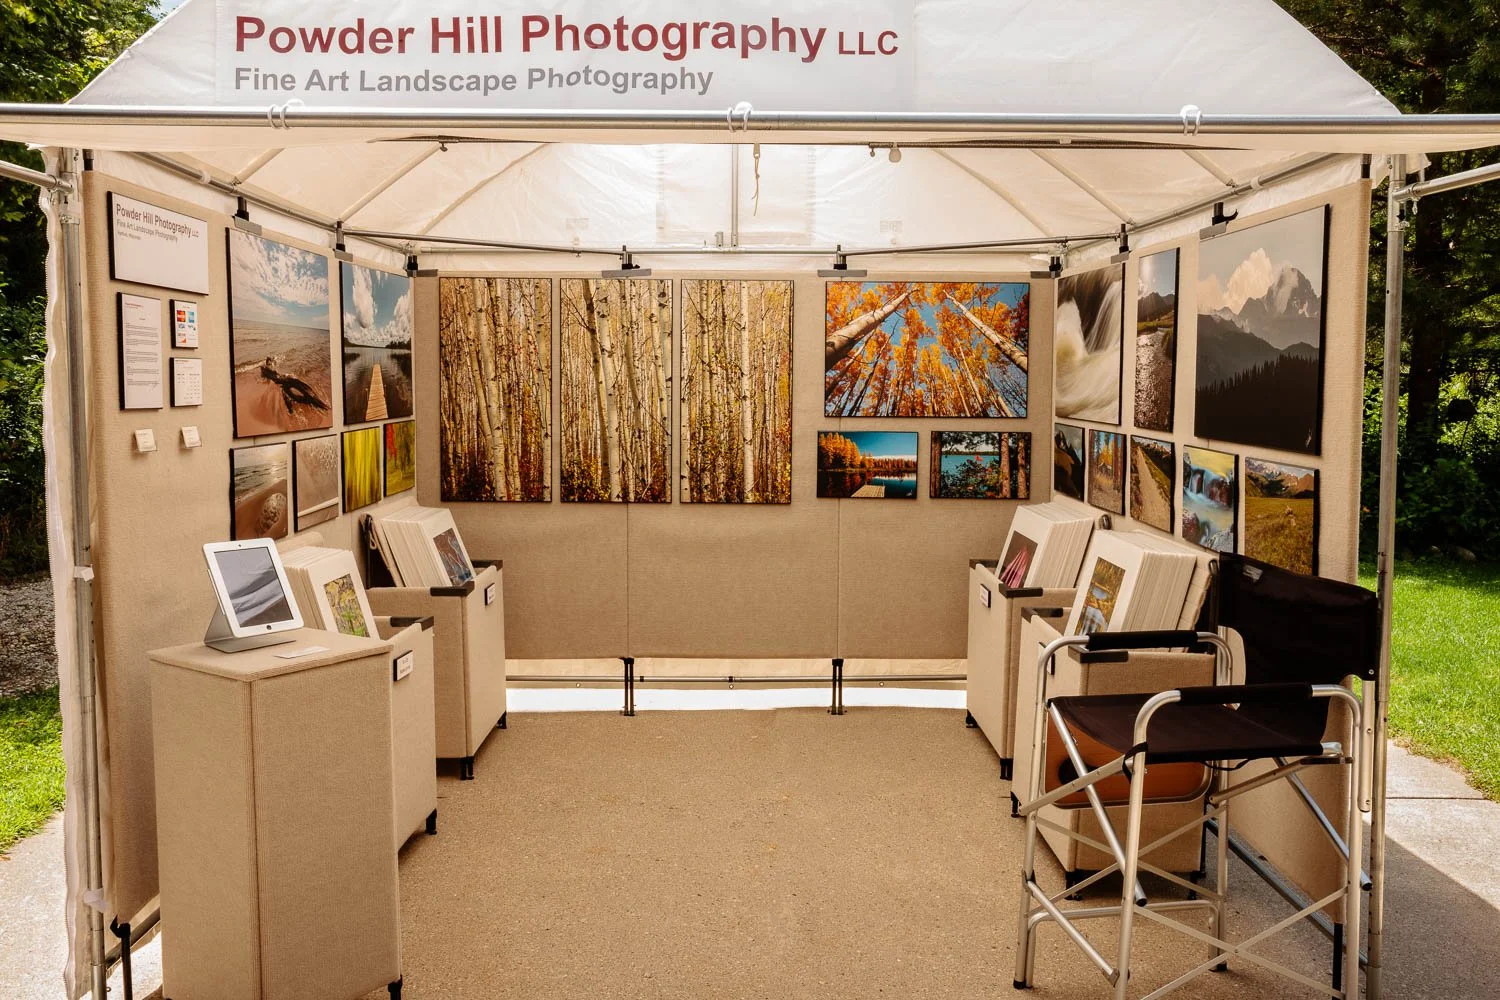
To solve that periodic question of “Do I print larger”, I printed and displayed a three panel Dura Plaq-mounted triptych prints. Each panel is 20” wide by 40” high, and can be spaced at any distance one may desire. Now I rarely get the question “Can you print larger?” And when I do, I show them the triptych, which can easily cover a large space. (Booth image immediately above).
The other change, perhaps minor but equally important. I put my iPad to use to electronically obtain email addresses. The individual now enters their own information using the touchscreen keyboard. Losing 20% of the names for my bad handwriting is now a thing of the past.
2017 and Beyond
My booth has remained with the same layout since the fall of 2016. The only thing that has changed, naturally, are the prints I choose to display as Dura Plaqs, and those that are matted.
When I look back at my first outdoor show in 2012, to my booth today, the one thing that has remained constant is my Trimline canopy. Changes may have occurred within the interior of the booth, though my trusted Trimline has served me very well.
My art fair booth has evolved over time. Each change has been a deliberate step in the evolutionary process. My booth remains “ready to go” for the upcoming summer season, and who knows what additional changes I may yet come up with?
2022 Update
After doing art shows since 2012 (skipping the pandemic year), in early 2022 I decided it was time to move 100% on-line. With that decision came the next - time to sell my beloved booth!
Incredibly, a wonderful artist from Nashville purchased the entire setup. I’m very happy for her, and know that the booth will serve her well throughout her successful artistic career.
